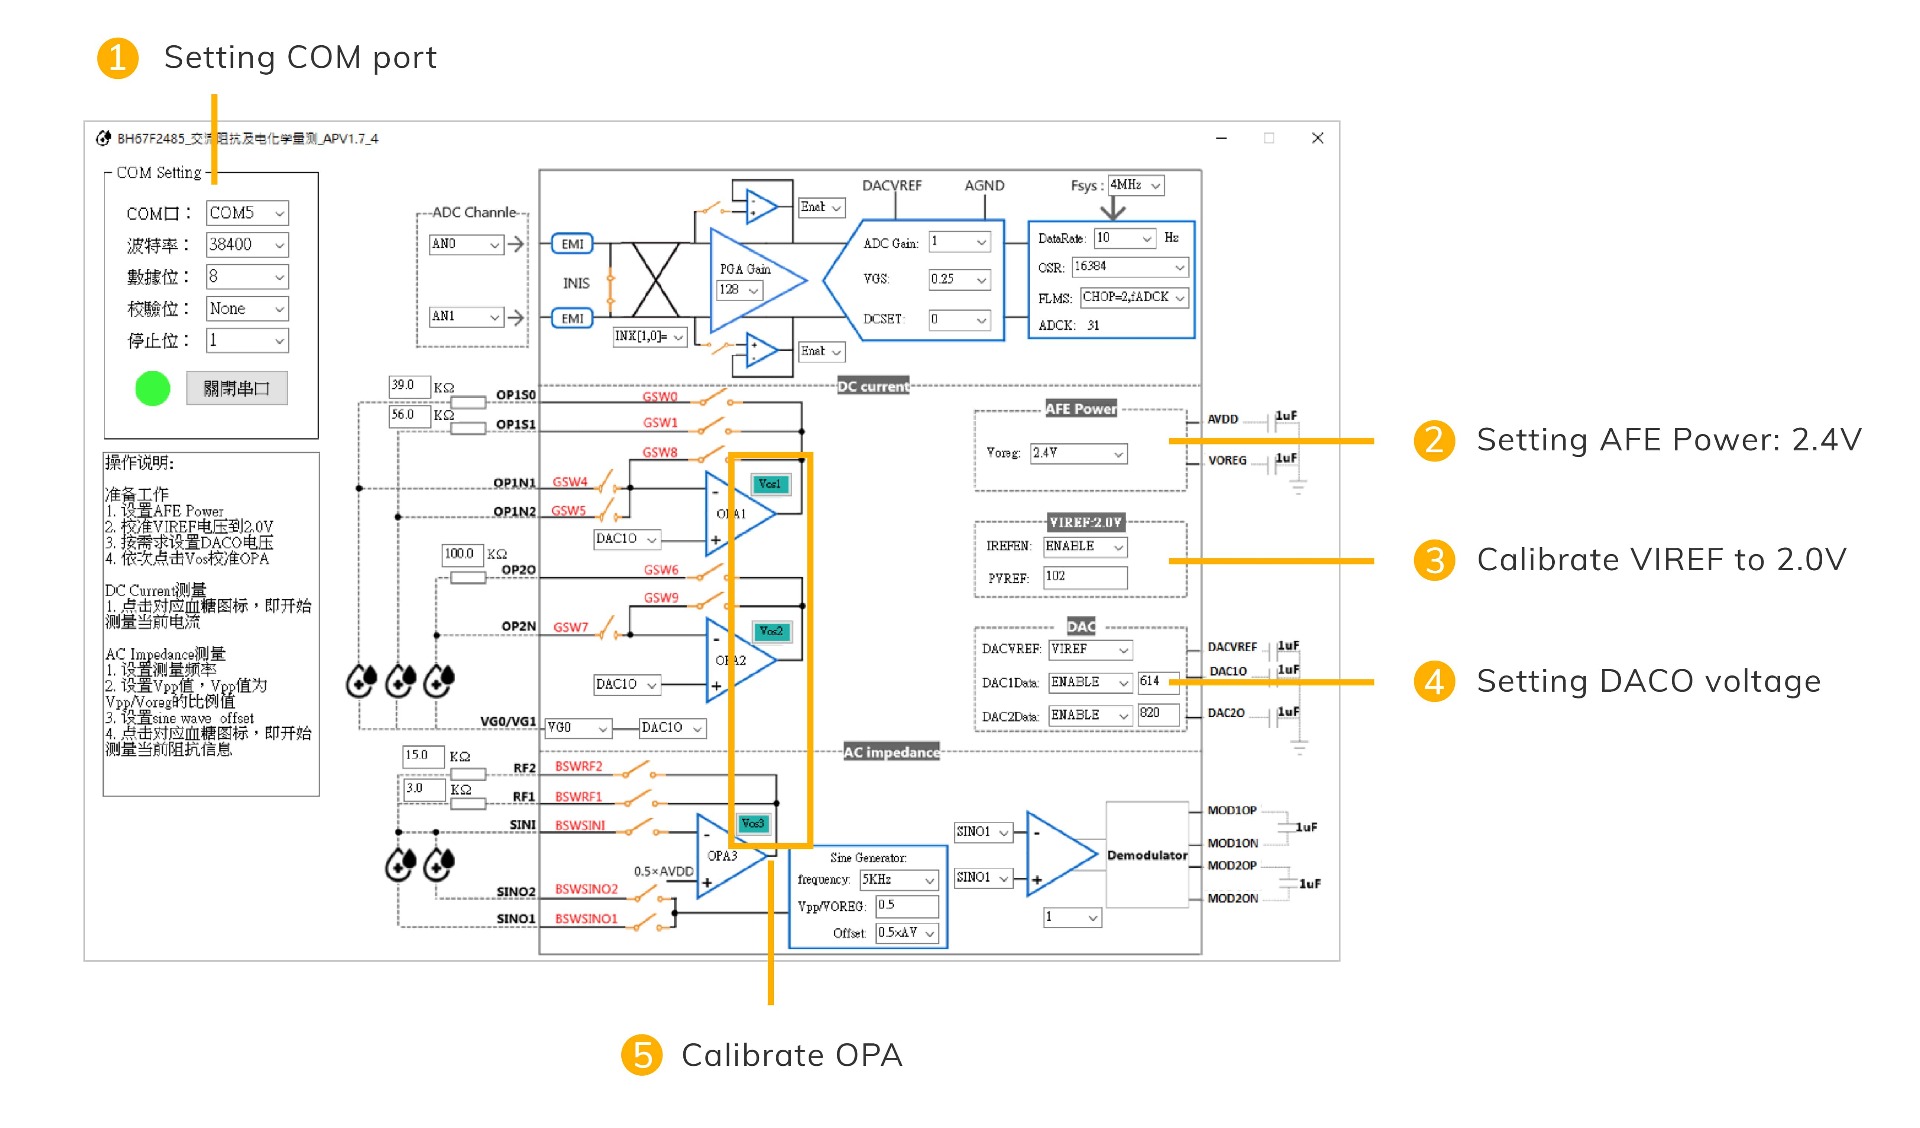
COM port setting: select the corresponding COM port and follow the instruction as below:
(1) Serial transmission rate: 38400
(2) Data bits: 8
(3) Calibration bits: None
(4) Pause bits: 1
(5) Press the button of open serial port after all the settings have been done.
Set the AFE POWER as 2.4V. Except for ADC, the Voreg is where all of the analog powers come from.
It is necessary to open it.
Calibrate the VIREF to 2.0V
(1) IREFEN: Enable
(2) PVREF: the value is decimal. When the value is 102, the VIREF is 2.0V. The value is adjustable.
Setting of the DACO voltage:
(1) DACVREF: VIREF
(2) DAC1Data: Enable. The value is decimal, when it is 614, the DAC1O is 300mV. The value is adjustable.
(3) DAC2Data: Enable. The value is decimal, when it is 810, the DAC2O is 400mV. The value is adjustable.
To calibrate OPA, please click the Vos1, Vos2 and Vos3 in order.
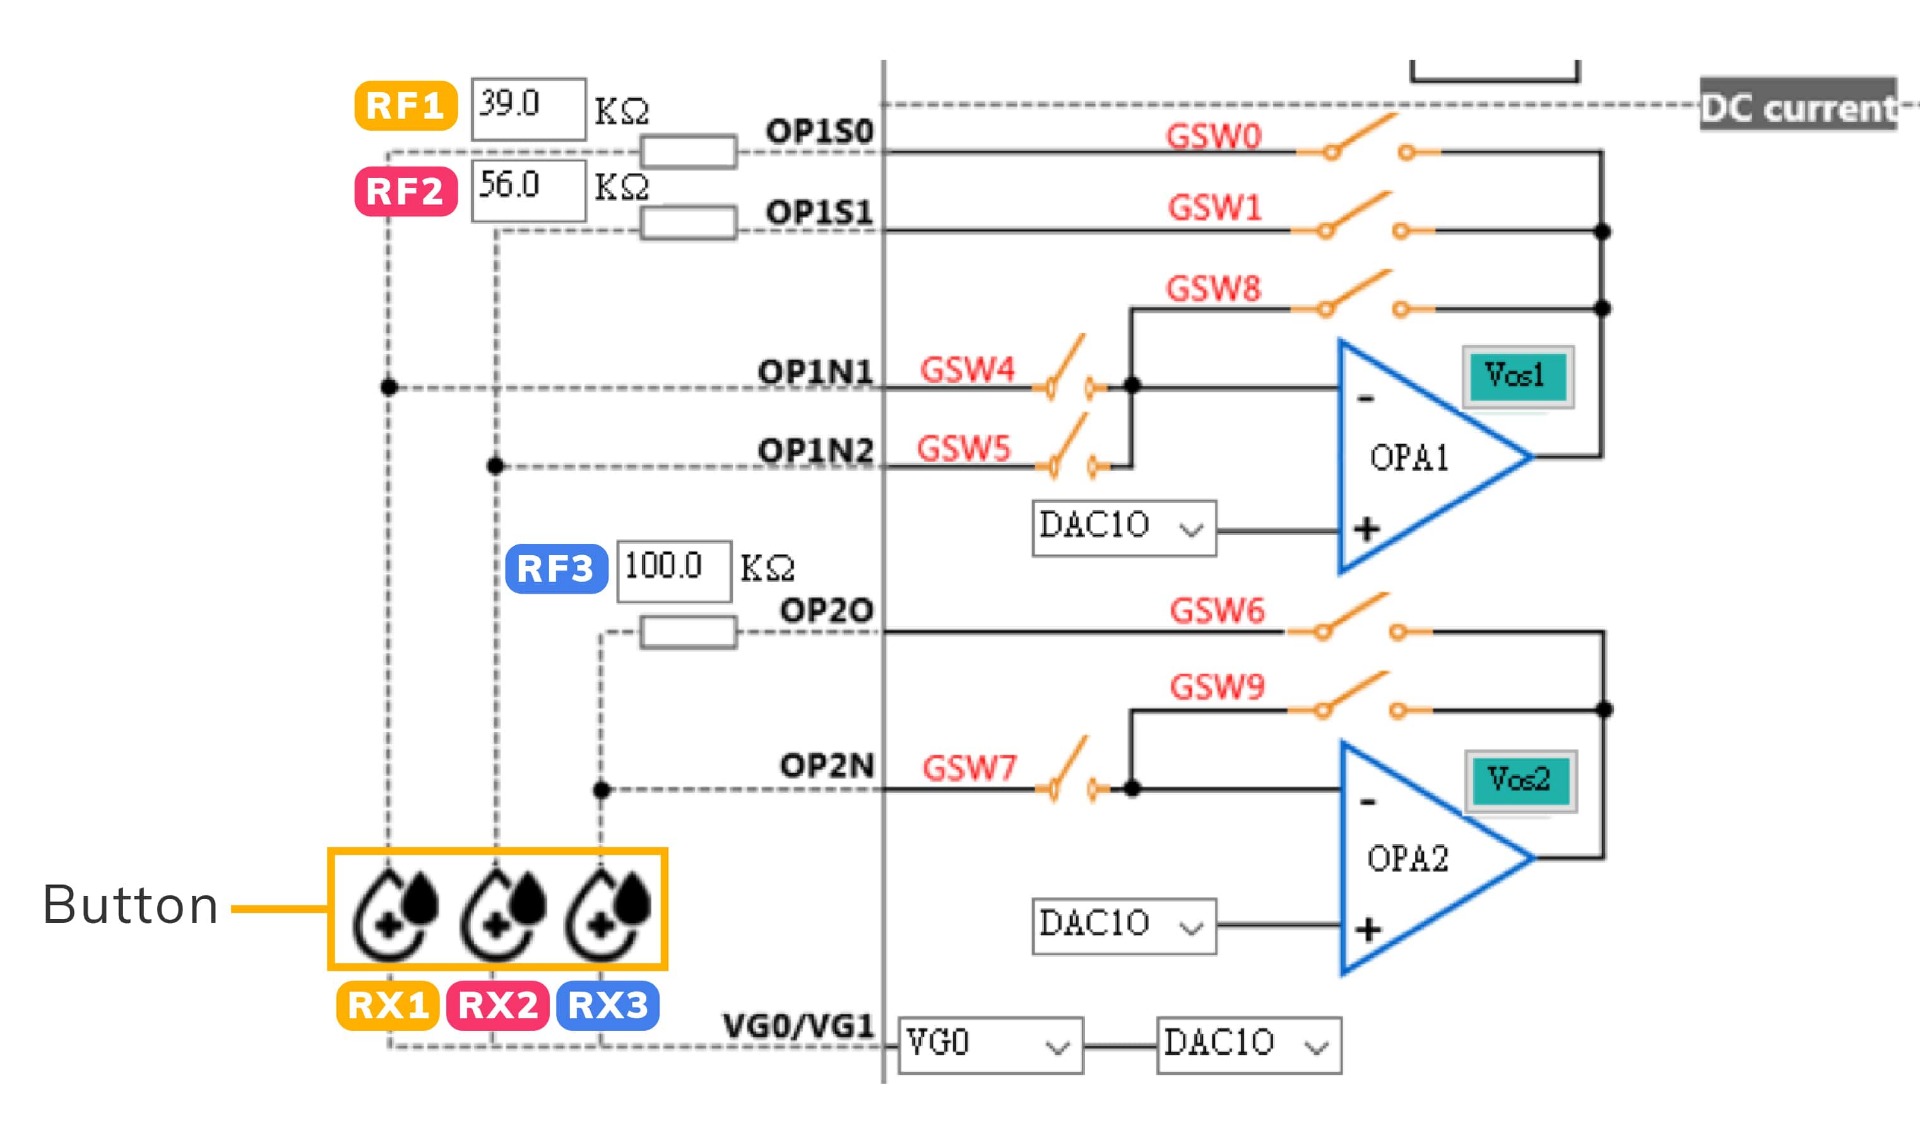
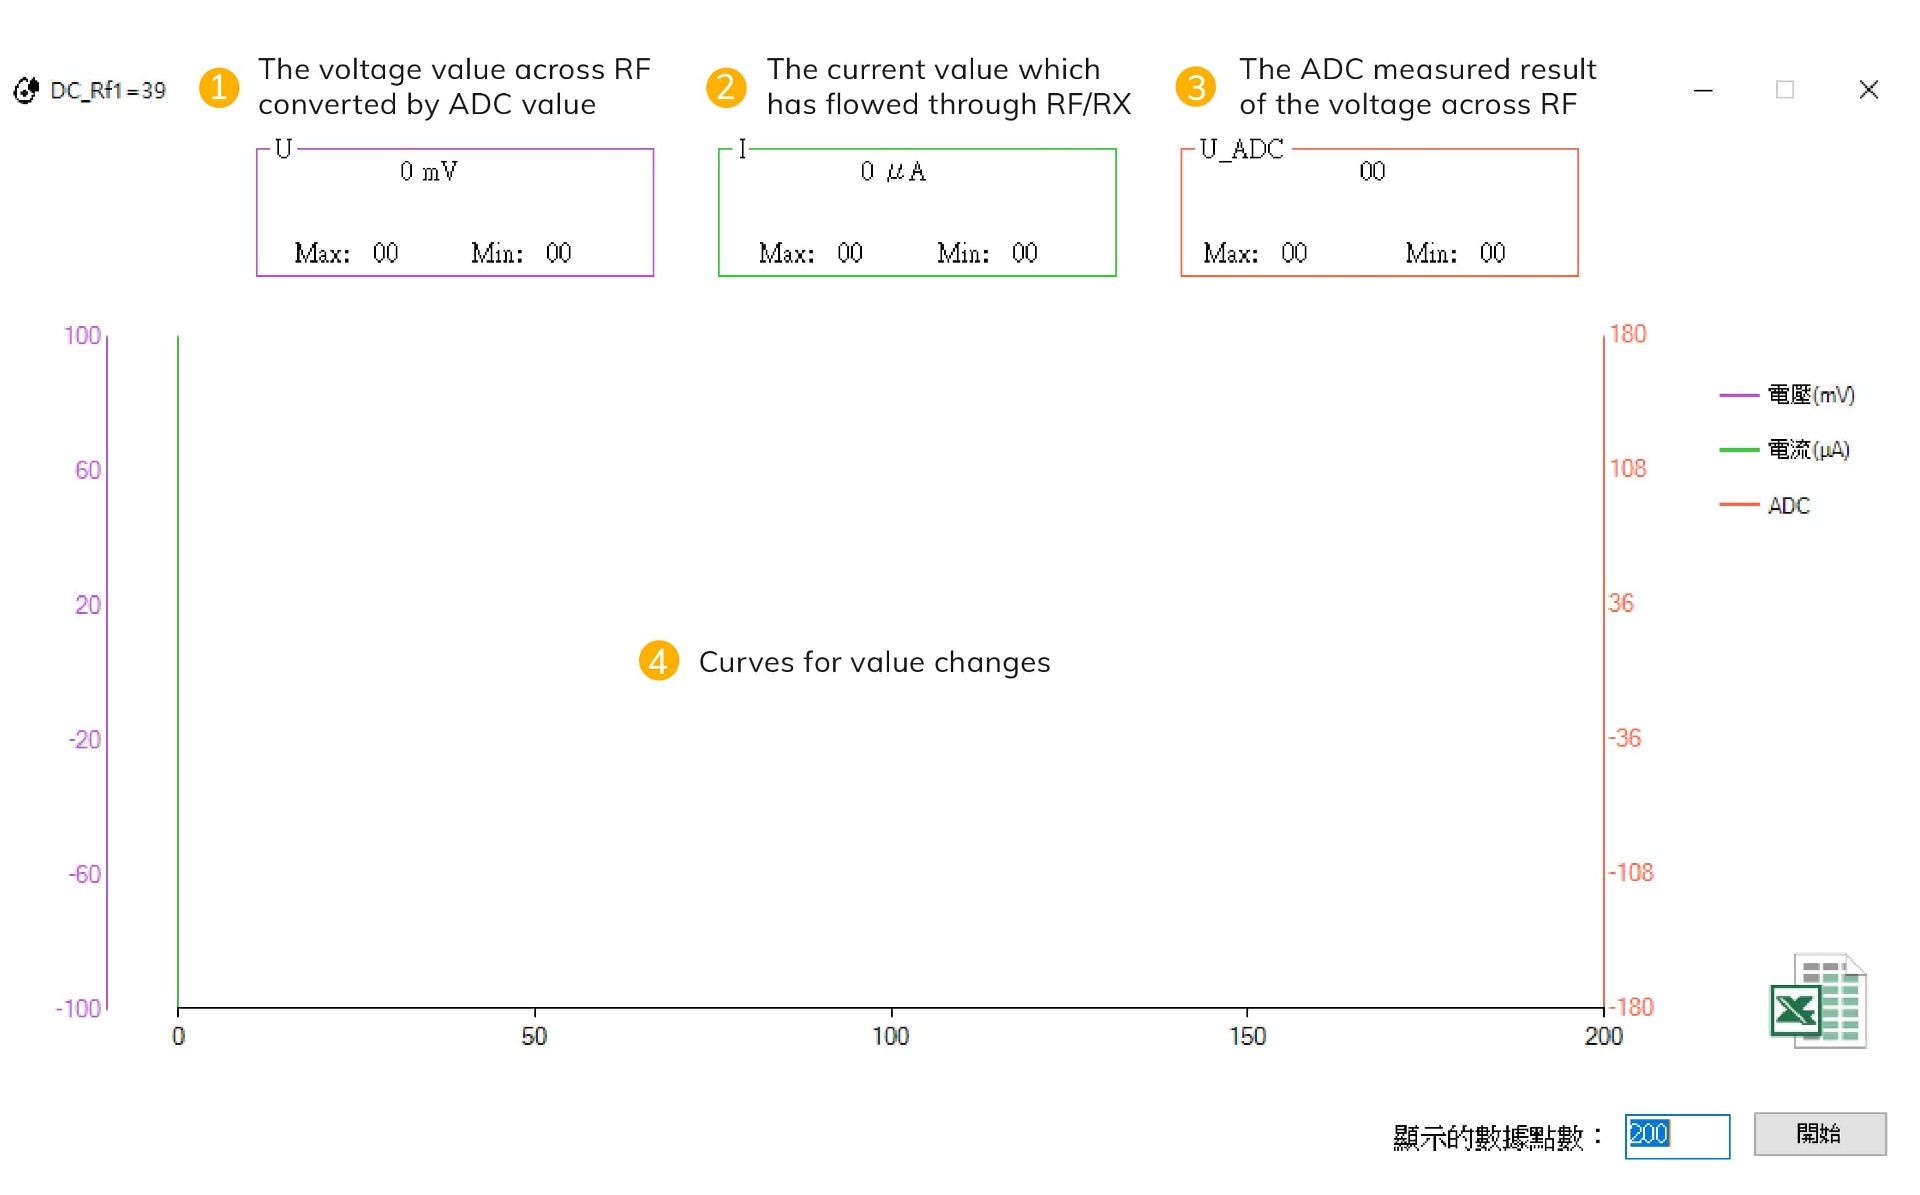
DC current measurement
Fill out the resistance value of RX1, RX2 and RX3. (The value can be up to two decimal places)
Insert a test paper. Turn the power switch to ON when use RX1 and RX2 or turn OFF when use RX3.
Press the corresponding button. (Example: after fill out the value of RX1, press the RX1 button)
After press the button, a window pops up (as below picture). Press the start button to start a measurement.
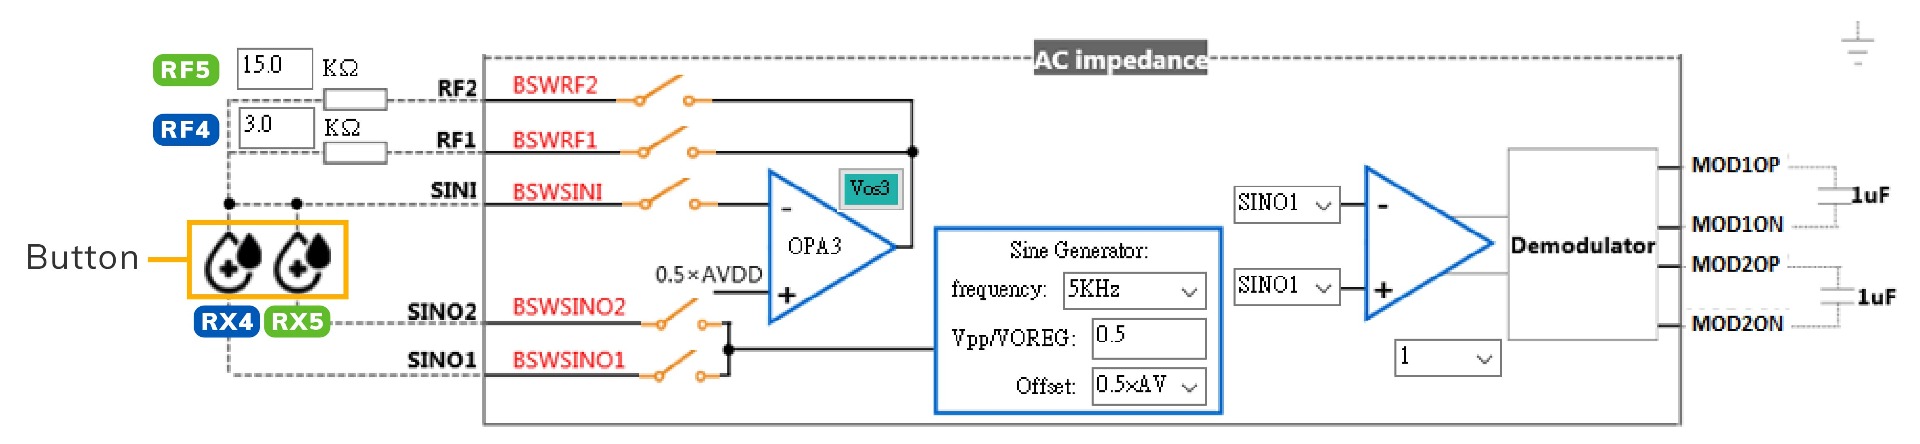
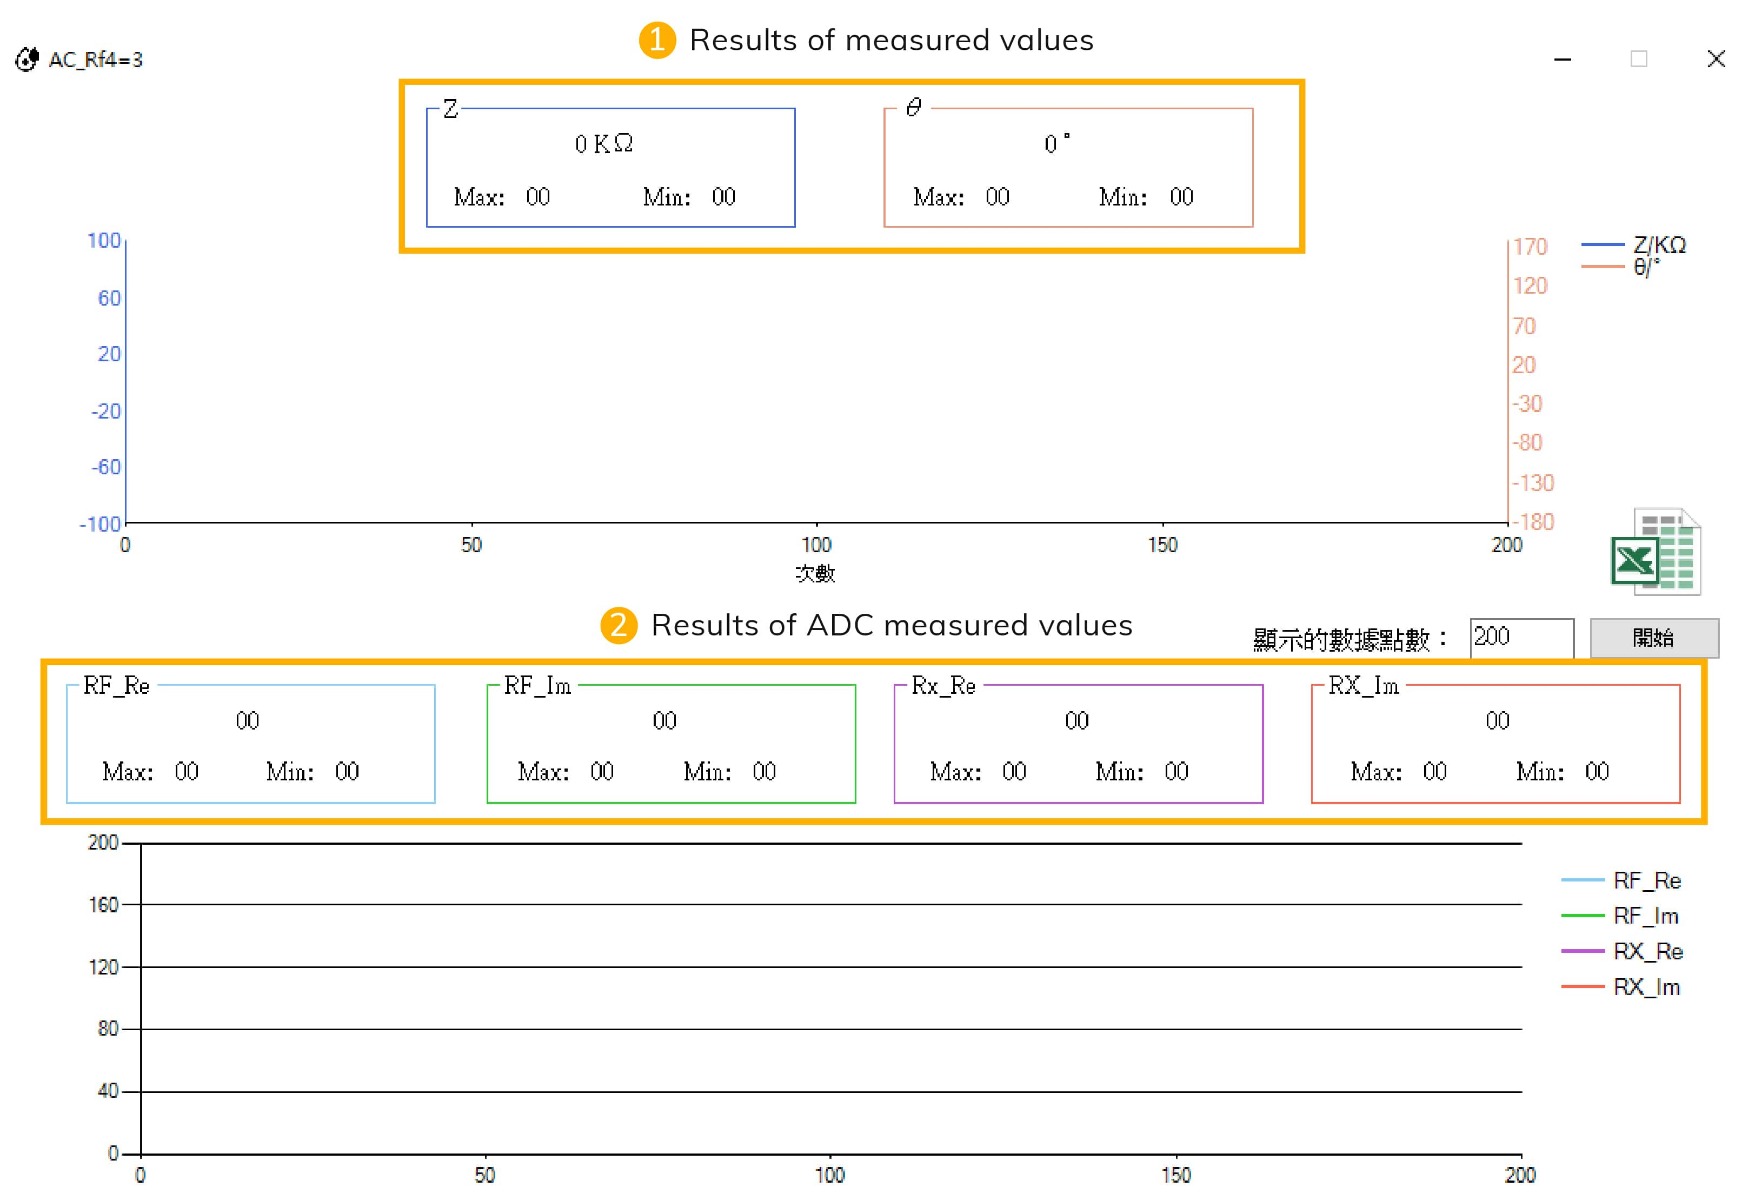
AC Impedance measurement
Fill out the values in Sine Generator: frequency, Vpp/VOREG and Offset.
- Vpp divides VOREG is the Vpp/VOREG value
- Set the value of Offset as 0.5AVDD
Fill out values of RF4 and RF5
Press the corresponding button (Example: after fill out the value of RF4, press the RX4 button)
After press the button, a window pops up (as below picture). Press the start button to start a measurement.
RESOURCES
MCU : Holtek BH67F2485, AC Impedance and Electrochemical Measurement Flash MCU, including datasheet, package information, tool information, etc.
Application: HCT Blood Glucose Meter, including user's guide, schematic, program code, application, etc.